Blog · Guide
How to compress images without wrecking them: the complete guide
What lossless really means, which format to use for what, and how to compress a whole folder in one go — with every step shown in ImageForge.
What lossless really means, which format to use for what, and how to compress a whole folder in one go — with every step shown in ImageForge.
Everyone runs into it eventually. An email bounces because the attachments are too big. A site takes four seconds to load because the hero image weighs 6 MB. A form refuses a photo for being over the limit. The usual advice — "just compress it" — hides a decision that actually matters: what exactly are you willing to lose? This guide answers that, and then shows the whole process end to end.
A photo is a grid of pixels, and each pixel stores a colour. A 12-megapixel photo from a phone is twelve million pixels; at three bytes each, that is 36 MB before anything clever happens. Every image format is, at heart, a strategy for storing those thirty-six million numbers in far less space — either by describing them more efficiently, or by deciding that some of them did not matter.
Lossless compression rewrites the file so it takes up less room while keeping every pixel exactly as it was. Decompress it and you get the original back, byte for byte. Think of it as packing a suitcase better rather than leaving clothes behind. The savings are real but bounded: typically 5–25% on a JPEG that came out of a camera.
Lossy compression throws information away — deliberately, and starting with what your eye is worst at noticing. That is why it goes so much further: 40–70% is routine. The catch is that it is a one-way door. Every time you save a lossy image again, it loses a little more, and the losses accumulate. This is why re-saving the same JPEG over and over slowly turns it to mush.
Which one you want depends entirely on the job. Archives, medical images, technical diagrams and anything you will edit again should stay lossless. Photos headed for a website, an email or a social post do not need pixel-perfect fidelity, and lossy will serve them better. ImageForge is lossless by default, which is the safe assumption to make on someone else's files, and lets you switch when the job calls for it.
The techniques are less mysterious than they sound. Run-length encoding replaces "forty identical white pixels" with "white, forty times" — brilliant for faxes and screenshots, useless for a photo of leaves. Predictive coding stores the difference between each pixel and what the previous ones suggest it should be; in a gradient those differences are tiny, and small numbers need fewer bits. Palette reduction keeps a list of, say, 128 colours and stores an index per pixel instead of a full colour.
For photographs, the heavy lifting is done by the discrete cosine transform, the maths behind JPEG. It converts blocks of pixels into a set of frequencies — broad shapes first, fine detail last — and then stores the fine detail more coarsely, because that is what the eye forgives. Chroma subsampling exploits the same asymmetry: we see brightness in far more detail than colour, so colour can be recorded at half resolution and almost nobody notices.
If you want one rule: photographs go to JPEG or WebP, graphics with flat colour or transparency go to PNG, logos go to SVG. AVIF is the best compressor of the lot and worth using when you control the site serving it.
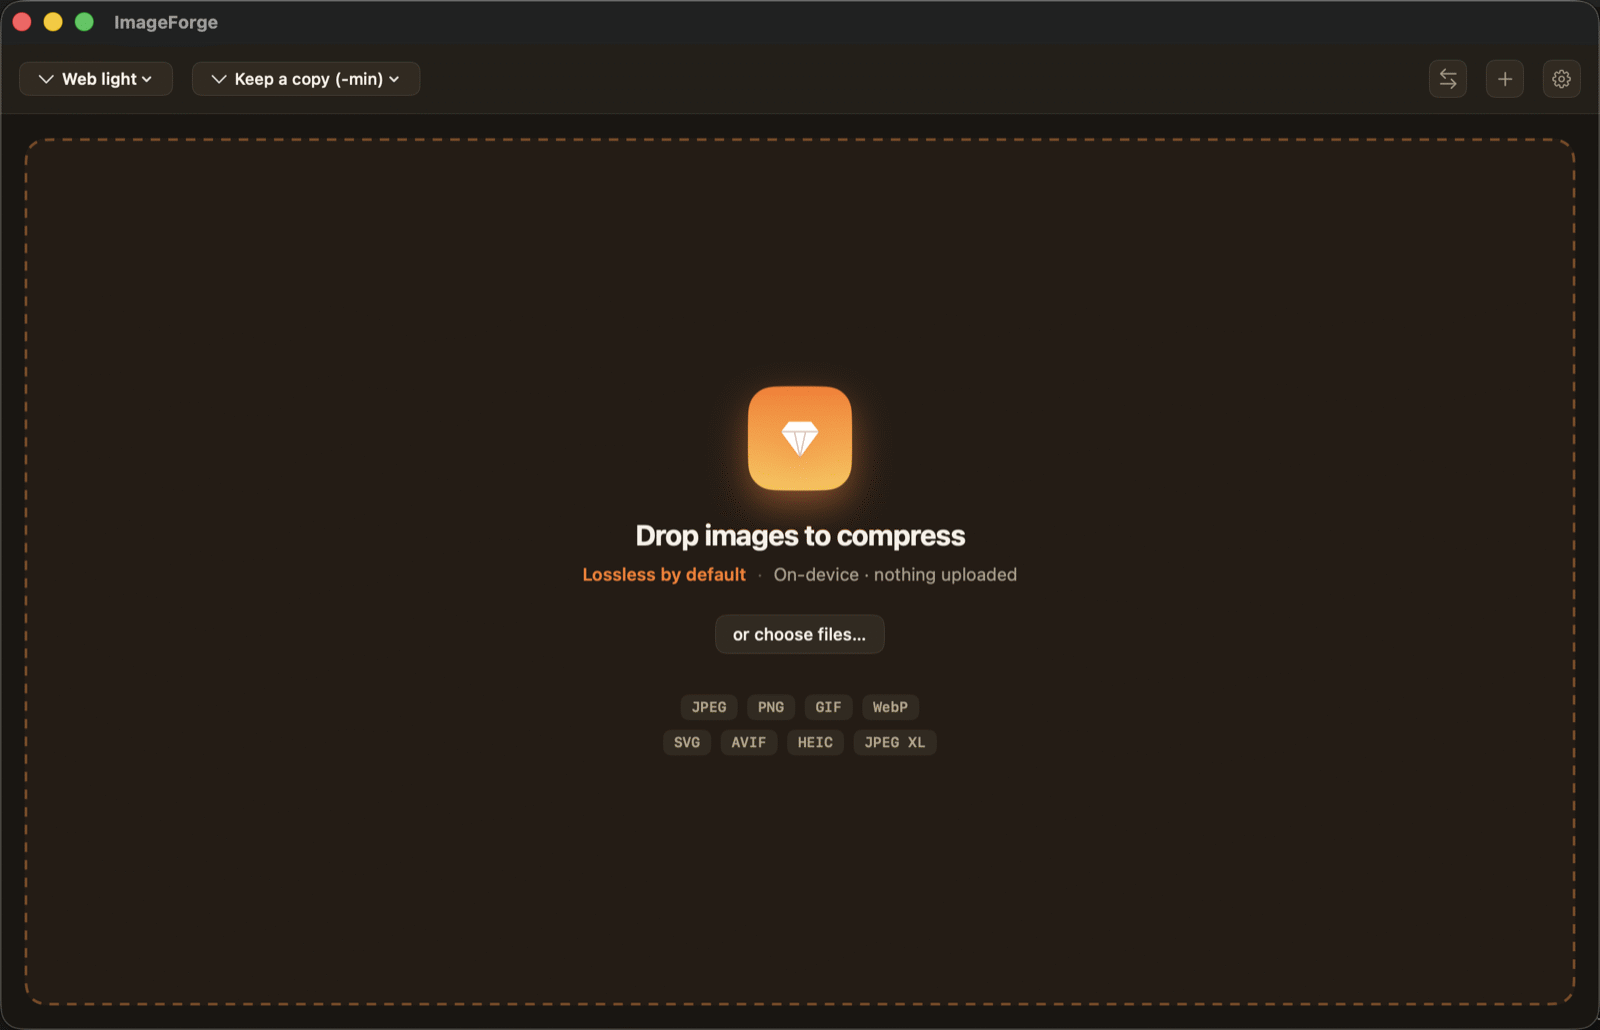
The app opens on the drop area. Everything below happens on your machine — no upload, no account, no queue on someone else's server. The screenshots are from the Mac version; on Windows the app is the same, with the shortcuts you would expect there.
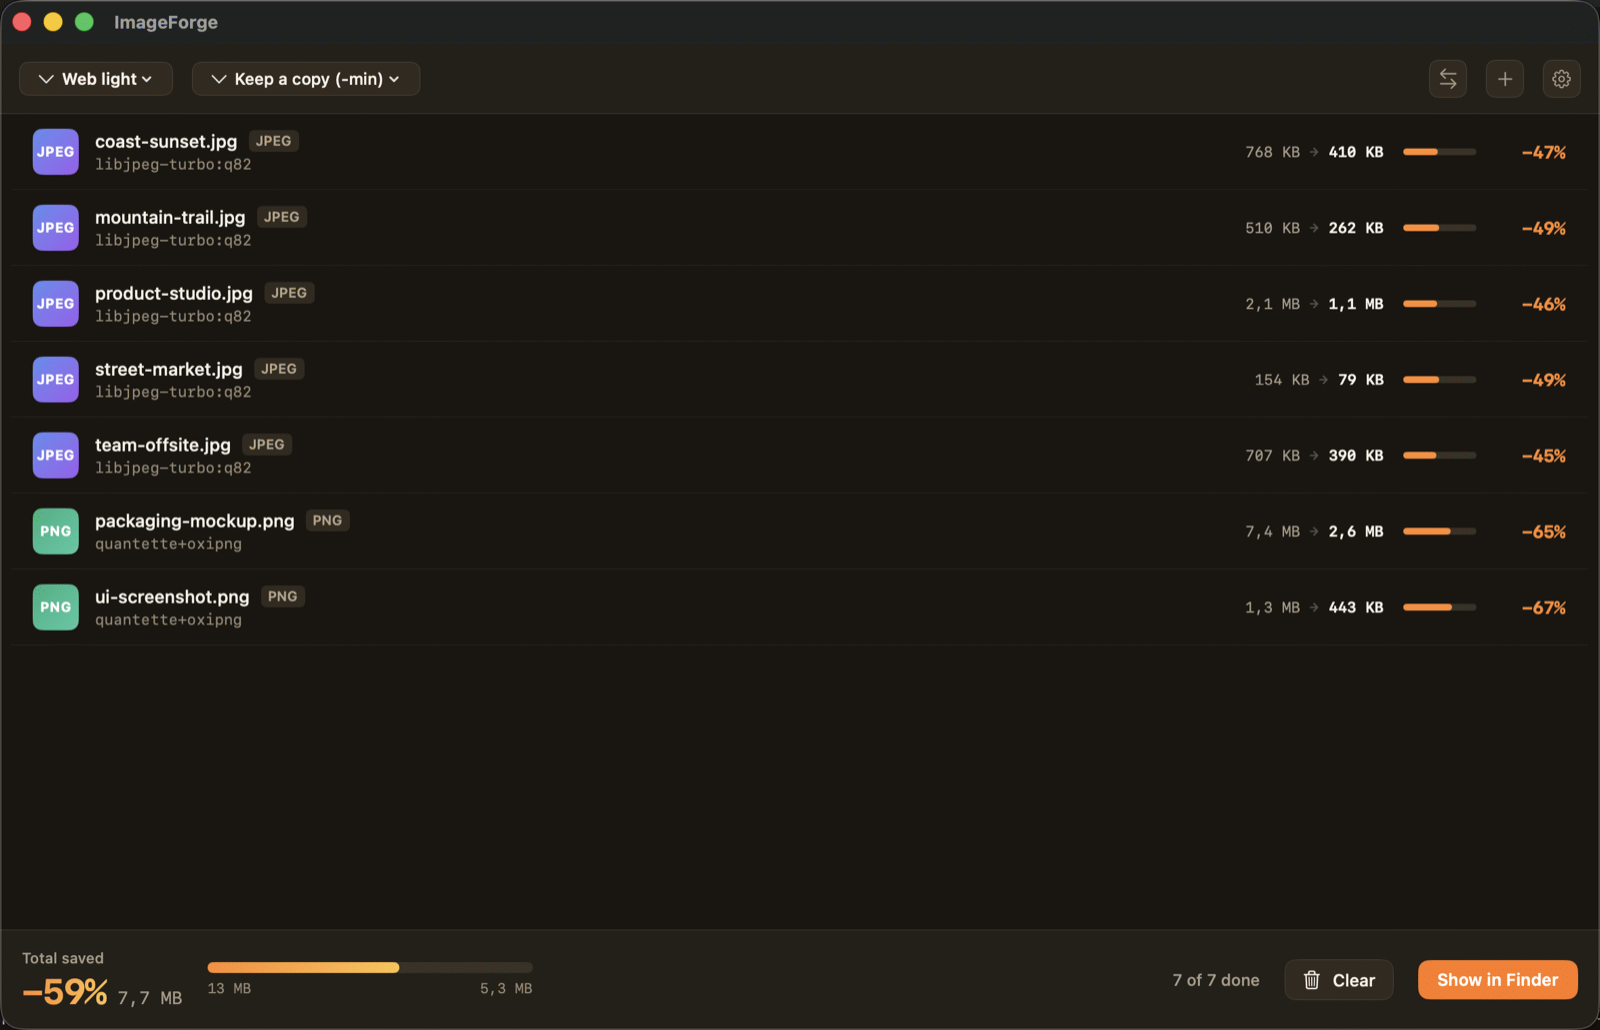
Drop images and compression starts immediately, in parallel, one row per file. Each row shows the before and after size, the percentage saved and which encoder did the work — a detail worth having when you want to know whether a file was rewritten losslessly or re-encoded. The bar at the bottom totals it up.
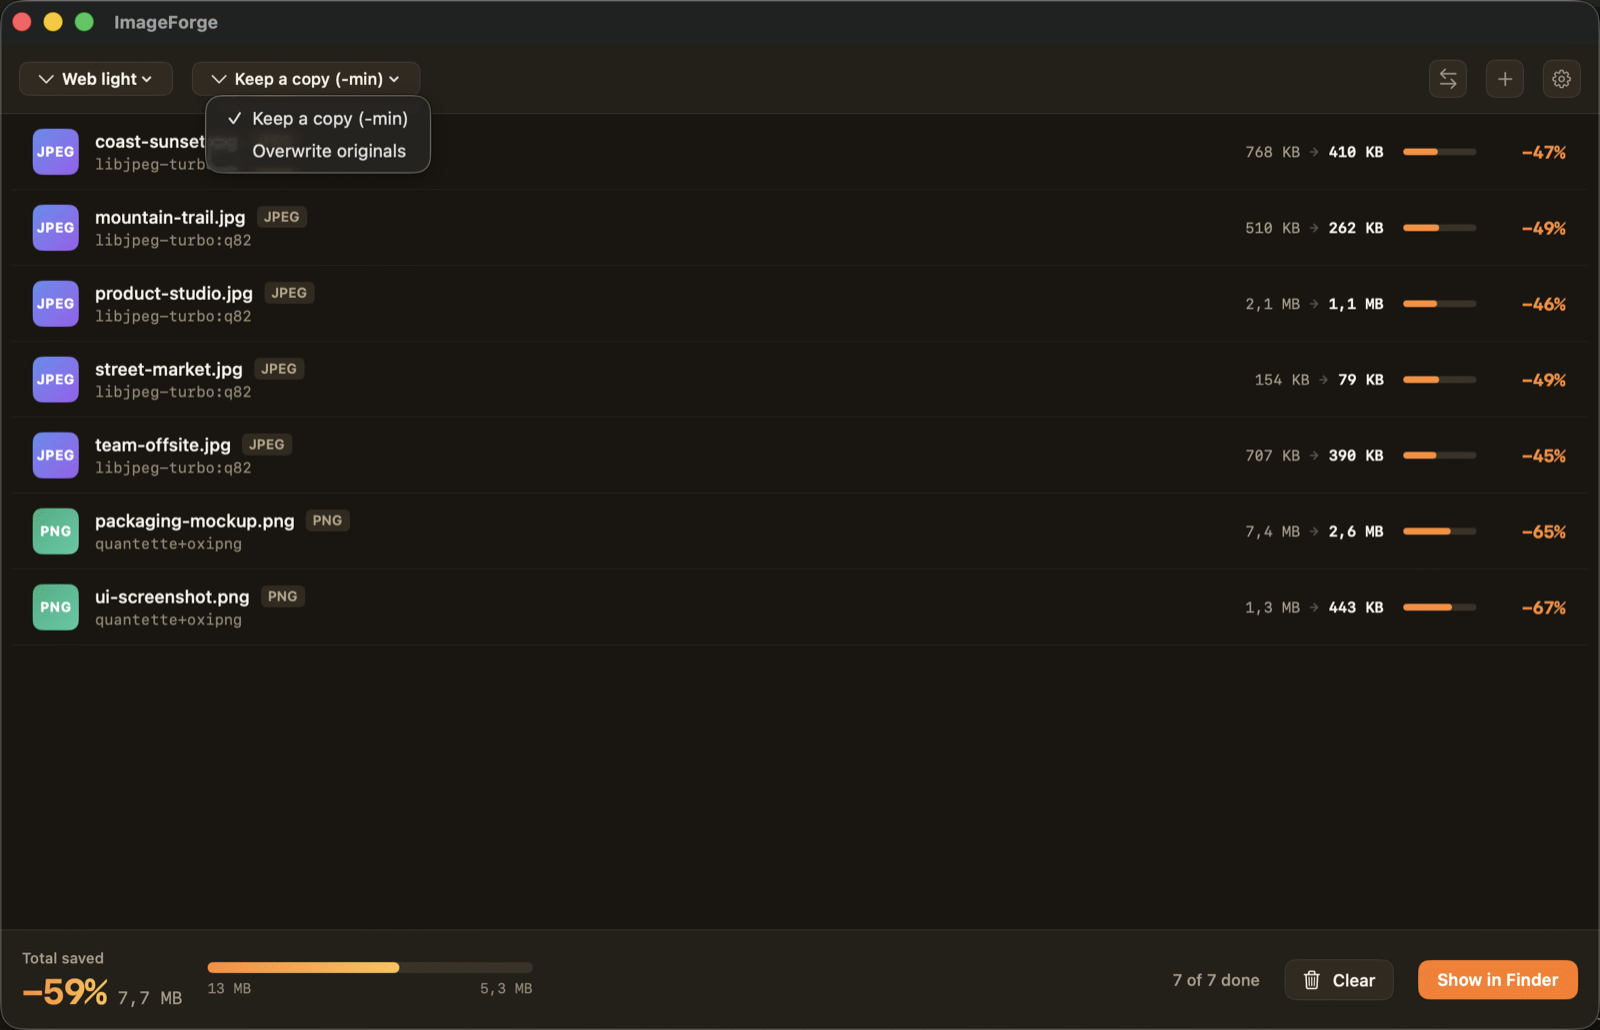
The second control in the toolbar decides what happens to your originals. Keep a copy writes a new file alongside each original with a -min suffix and never touches what you had — the right default when you are experimenting. Overwrite originals replaces them in place, and sends a copy of each one to the Trash first, so a bad call is recoverable.
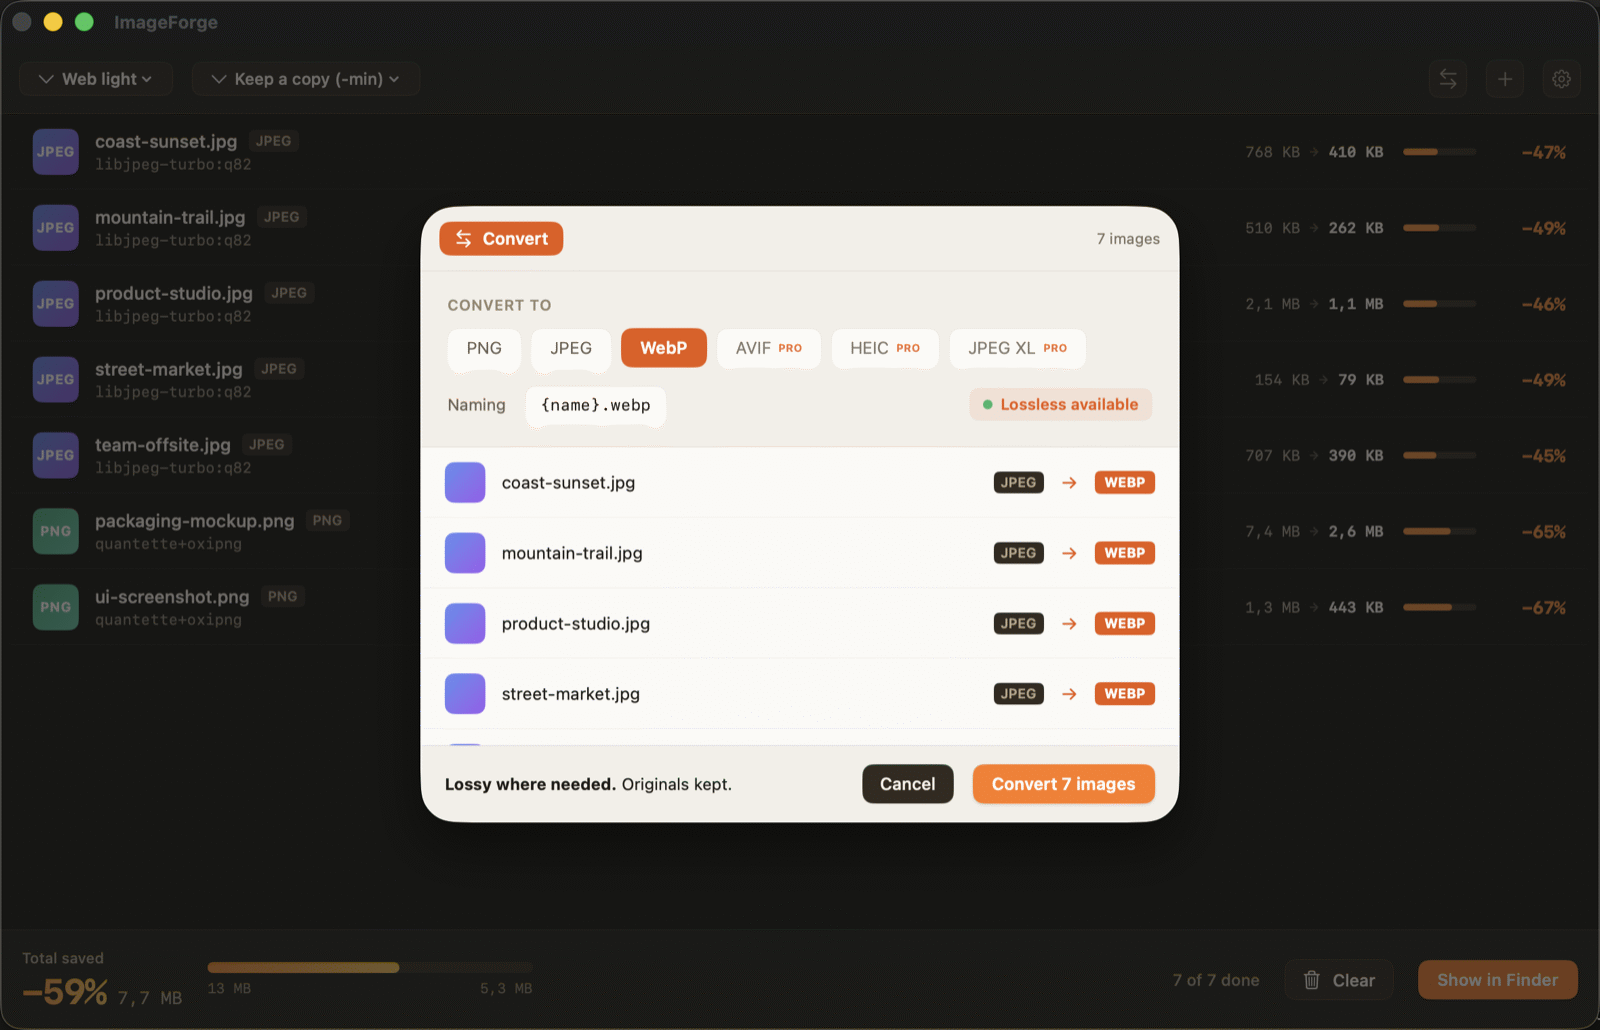
To change format rather than just shrink, use Convert. Pick the target, and the sheet tells you upfront whether the conversion can be done losslessly — converting a PNG to WebP usually can, converting a photograph cannot. Your originals stay where they are.
For the web: resize before you compress — a 4000-pixel-wide photo displayed at 800 is wasting 90% of its bytes no matter how well you compress it. Then WebP or AVIF, quality around 80. For email: anything under roughly 1 MB per image will get through; lossy JPEG at 70 is plenty. For print: stay lossless and keep the colour profile. For archives: lossless, always, and keep the metadata — the date and camera are part of the record.
One number worth remembering: quality 80 is the sweet spot for photographs. Below 70 the artefacts start showing on flat areas like skies; above 90 the file grows fast for a difference nobody sees.
Most online compressors upload your images to a server, compress them there and send them back. That is a copy of your file on someone else's computer, governed by a privacy policy you did not read. For a holiday snap, fine. For a client's product shots, an ID document, a contract scan or anything with faces and locations in the metadata, it is a decision you should be making on purpose — and in Europe, uploading personal data to a server outside the EU can be a compliance problem all by itself.
ImageForge does the work on your own machine, which is why it needs no account and no network. The screenshots in this article were compressed with it: 1.1 MB down to 320 KB, 71% saved, without any of them leaving this laptop.
Compressing the same file over and over. Each lossy save degrades it further; always go back to the original. Using PNG for photographs. It is lossless, so it will be several times larger for no visible gain. Compressing before resizing. Do it the other way round. Stripping metadata you needed — or keeping GPS coordinates in a photo you are about to publish. Judging quality zoomed in at 400%. Look at it the size people will actually see it.
Get those five right and compression stops being a gamble. Most images can lose half their weight with nothing visible changing — the trick is knowing which half.
ImageForge is free on the Mac App Store and the Microsoft Store. Everything runs on your machine.